n the russian village of kamarchaga, in the siberian taiga, russian pensioner olga kostina has used 30,000 plastic bottle caps to adorn
her home with colorful patterns and images - making it somewhat of a local landmark. over many years, in the isolated rural town
situated just in the perimeter of the taiga's forest, kostina collected the lids and once she felt there was enough she created detailed
murals across the walls of her home with images of traditional macrame motifs and various creatures living in the neighboring woodland.
hammering every cap by hand, kostina used the conventional macrame technique of weaving and knit knots to fabricate the detailed mosaics.

Hey Hey Hey!!!!
If your hands are asking you to do something and you are concerned about ecology on this planet, take a look at my tutorials. Caution, they might inspire you for a long hours of creative work. If they do, please let me know via comment or email.
Have a very very nice day!
Показаны сообщения с ярлыком handmade. Показать все сообщения
Показаны сообщения с ярлыком handmade. Показать все сообщения
четверг, 20 сентября 2012 г.
вторник, 14 декабря 2010 г.
Tutorial: How to make ears for the baby hat (knitting)
1) I knitted the hat and 2 triangles same color as the hat (10 loops at the bottom row), they look like this. don't worry about the rough looking edges.
2) Cutted same shape from the foam and from the pink color cotton stretch
3) Put the all together and stitched knitted part with pink part
4) After stitching the future ear looks like this
5) I have cutted the exceeded fabric and sponge and played with the ear shape.
6) Stitched the ear to the hat
7) And here we go - original baby hat, that will catch many attention and smiles
пятница, 14 мая 2010 г.
TUTORIAL: RECYCLING THE SOFT MILK PACKS INTO THE MULTI-PURPOSED STITCHED BUCKET (with pattern)
1. First you prepare the milk packs, you wash them, dry them and cut all the seams and unfold it, so the soft milk packs become just a square of plastic material like this
3. Transfer the pattern to the plastic. First the outer side (4 walls and bottom), you may want to make it look beautiful and include the best of the pack drawings into the outer wall pieces, as you gonna see outer side more often. After cut out the inner side from the plastic that is left. If there are not enough full size pieces, stitch some pieces together by hand or with the machine and after that cut out the pattern. You may also want a beautiful drawing on the inner bottom. I used a heart image from a fabric conditioner pack.
4. I stitched manually outer part using the bias. First wall sides and then the bottom part. I used rather big needle and rather thick thread.
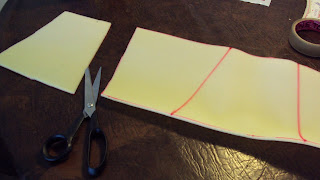
5. Cut out the sponge. I used it only for the walls. So that the spongeless bottom allows you to fold the bucket easily and keep it folded.
You will need at least 6 packs (my unfolded milk pack size is 30x23cm(12x9in)). You also can use any thick flexible plastic packs or fused plastic.
2. Print and cut out the pattern from this pdf files one, two, three. Please use some used paper. This bucket pattern is without the seam allowance. Either your bucket will be smaller or add up half a cm (1/4 inch).
3. Transfer the pattern to the plastic. First the outer side (4 walls and bottom), you may want to make it look beautiful and include the best of the pack drawings into the outer wall pieces, as you gonna see outer side more often. After cut out the inner side from the plastic that is left. If there are not enough full size pieces, stitch some pieces together by hand or with the machine and after that cut out the pattern. You may also want a beautiful drawing on the inner bottom. I used a heart image from a fabric conditioner pack.
I sewn with the machine the inner side. Also possible to do it by hand. This material is a bit tricky and can slide to sides when you sew it. When I had my inner part ready, i put it aside.
4. I stitched manually outer part using the bias. First wall sides and then the bottom part. I used rather big needle and rather thick thread.
5. Cut out the sponge. I used it only for the walls. So that the spongeless bottom allows you to fold the bucket easily and keep it folded.
I stitched by hand 3-4 cm center of the sponge to the center of the inner wall. To stitch the walls of the sponge is unnecessary. When you put this inside, it will still keep the shape.
6. Put the two parts of the flexible milk pack bucket together (checked twice that that bottom angles and upper wall sides are matching (cut a bit where they exceed)) and stitch them. I started from the middle of the walls, so I can correct in the corners a little bit more to make "in and out wall seams" match perfectly.
7. Here we go, the bucket is ready and is used for keeping the stuff.
Ярлыки:
flexible plastic,
handmade,
home,
milk pack,
plastic,
plastic pack,
recycle,
tutorial
Подписаться на:
Сообщения (Atom)


